Saturday, March 8, 2014

Do You Need Help With Your Projects?

I'm here to help you! 

Please write me about your craft and sewing needs. I have a vast amount of experience. I'm interested in creating an interactive forum here. 
I'd love to hear from you!
  Here is a sampling of some of the NON- Clothing projects I've been making lately!
Seeded Cable Dog Sweater

Zeke 


Paper Crafting-Samples Sets for my thread and elastic listings

A 3 inch hoop for a craft swap
Large Messianic (Judeo -Christian) Banner- made in Rip-Stop-nylon with applique  

Embroidery- Gold Metallic Thread ON VELVET - This was a Custom Order

Crochet- Small Cotton Shoulder Bag With Glass Beads

Crochet with Felt Leaves, Beaded Broach or Hair Ornament

A Wedding Kippah- Crochet With Metallic Embroidery


Knitting- BOBINA is her name- Made from "BOBO The Clown" Pattern

Knitting- Wool Cabled Hat and Scarf, also included leg warmers. Modeled by my daughter, Crystal.

Thursday, June 20, 2013

I just made a light box today!

Today I made a lightbox! 

I still need to work out the lighting, and camera settings. It's a real learning curve! I am an amateur photog- never had a class in my life! Just a lot of trial and error with a 5 year old Olympus FE360 digital camera. It really is a great camera, and I'm starting to learn all it has to offer.   However, I need to post some new listings on my Etsy shop~ and they really want quality photos!

Since the opportunity for me capture the perfect light outside is rare, I am going to try to get this to work for me!

 ( My box was modified from others I saw on the web. I'll post credits if I can find the page again!)

 INSTRUCTIONS:

I found an ALMOST square 12inch box. Then, using a metal ruler, marked off 1-1/4 inch lines from the edges on the 4 sides. I used white duct tape to clean up the edges. It also adds reinforcement, and clear tape can be removed from the surface if fabric needs changing. 

#1     Here is the first stage of cutting and taping the box. You don't have to do all this work, I just got carried away!  I like the added finish it gives.


#2     I made an inner frame to attach the fabric to, so the inside of box would have a clean finish- just in case I wanted to lean something up against the sides. There is a board for the bottom, to adjust for angles.
    #3    This shows how sheer my cotton organza is. The fabric was quite wrinkled from pre-washing. A necessity, since the friend who gave it to me had it for a long time. 
    I cut the size I needed, slightly larger; and got it wet. Then I ironed it dry on a clean sheet of muslin. That got out all the wrinkles.
    I think this fabric will be great, since it has natural stiffness and will work well inside or outside.


    #4     Here's where I covered the frame.The fabric was taped to the back. It was stretched so there are no bubbles.


     #5     I cut to fit a clean white board and carefully stretched a wrinkle- free square of fabric. It was taped securely and stretched gently. The board can be positioned on an angle if desired. I cut and folded another piece of cardboard to support the angle from  underneath.


    #6   This is the back of the insert as I was taping the fabric. I started by pressing a crease in the top edge, and taping in place at the back top edge.
    I did use a light layer of spray adhesive on the front of this, but if you aren't careful, it could get messy.

       #7    Fabric insert in place, a piece of  poster board ( the matt side) and the top fabric is ready to stretch and tape in place. It was trimmed to overhang the edge about 7/8-1". then carefully stretched as I taped it on all sides.


     #8 All I have to do now is get the reflector fixture from the top of the closet, and start experimenting with  light/ camera settings.     I'm trying to get the glare off these button packages.....A Challenge!


     Below is a photo of elastic I shot as a test, using a single compact florescent bulb indoors.


    Please feel free to add your comments!  Thanks for checking out my Blog Post!

    Tuesday, August 14, 2012

    Hanging Out With Dad!


    Last month my 86 year Old Dad had a health crisis. He's doing better now, and I'm now a full-time caregiver. He loves to ride his bike, even with only one foot as a pusher! Love being near the ocean, 10 miles is closer than Phoenix! IF ONLY I had time to get there!

    Meet BOBINA!

    Hi! I'm Bobina! I was born of a knitted clown doll pattern! My brother Bobo scared people- so Mom made me! Brother Bobo is still lurking in the knitting basket. I'm about 24 inches tall, and am made of 100% wool yarn. My clothes are custom-made! I even have more clothes than these- my Mom hasn't taken pictures of yet!


    Wednesday, February 22, 2012

    Stony Mountain Watercolor Spring 2005

    I painted two watercolors as a panoramic set. They were at my Dad's house in California. I just brought them back home. Here is one, minus a lot of the edges, due to the scanner's size.  I thought it fitting, since it is early spring here. This is the mountain my Mom and I live under. It is called STONY MOUNTAIN. I have been clearing rocks out of our garden beds for a week. And, Finally have a new Spring garden planted!

    Monday, January 23, 2012

    Thanks Sharon For This Awesome Blog Layout!

                        Isn't this theme just perfect?
                I Love it! It makes me "sew happy!" 
                   Actually, that's the name of it!  SEW HAPPY!
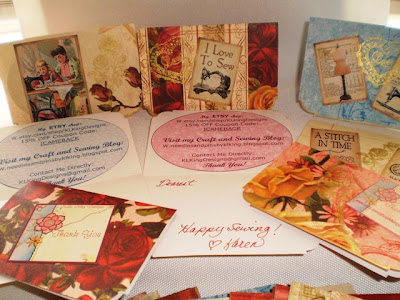
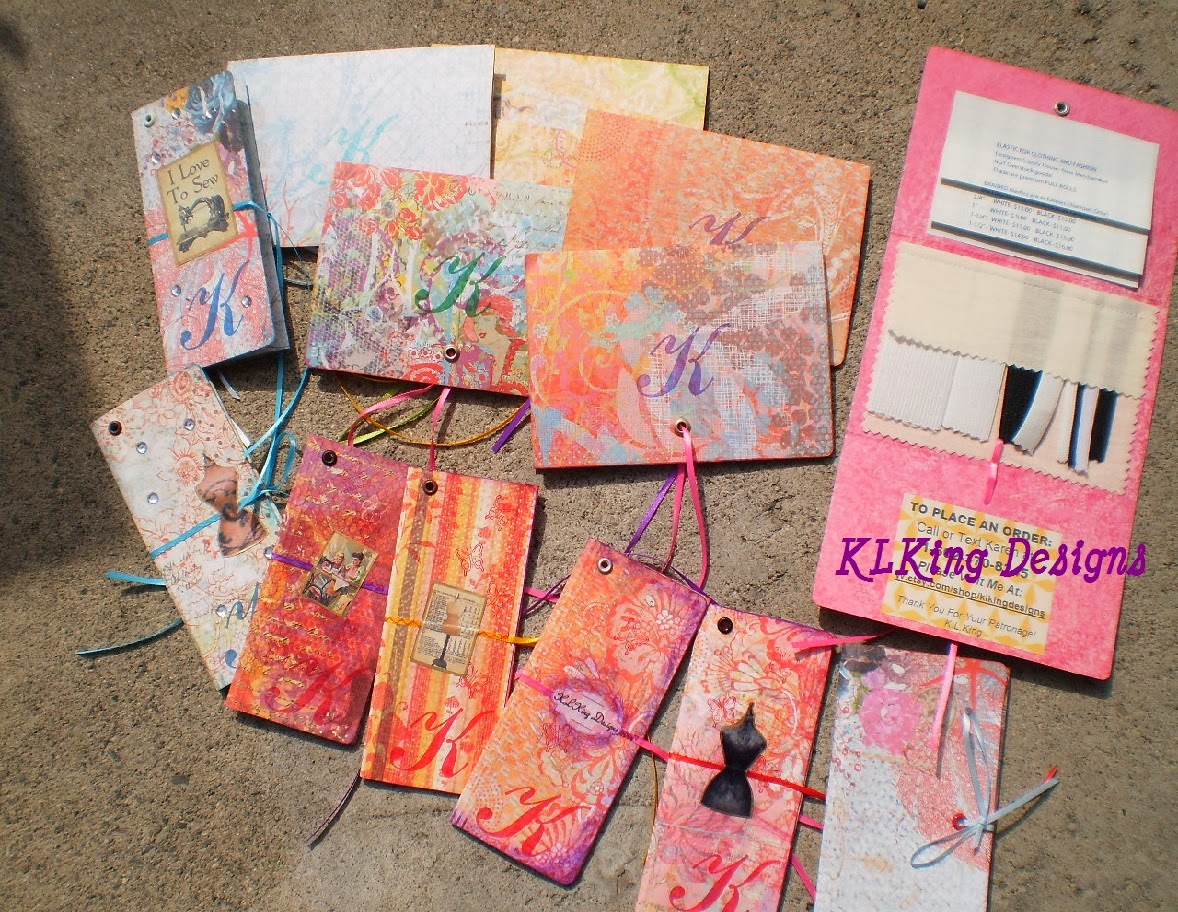
      I hope she doesn't mind it, but I made some Thank You cards for my ETSY shop and others. I used some print-out stickers from the Thank-You avatar, along with other sewing themed art I  purchased from another talented lady,  named Jamie, from Masterpiece Designs. I had so much fun making these, I cut out another stack of paper for another batch!
      Since I'm only JUST learning how to create with my PC, mastering  basic Word and Publisher skills are still
    on my priority list! BUT.... I'm thrilled with the way these turned out!

    Thursday, January 19, 2012

    My New "Design it Yourself" Stitchery Kits ~ Now on ETSY

    http://www.etsy.com/shop/KLKingDesigns   I carry  Vintage to Contemporary Sewing Patterns and other items, such as my new  "Design -It- Yourself" Stitchery Kits . There is no limit to the ways you can use your patches, as  accessories or embellishments.  Let me tell you about them....
       I make shaped patches in 14 Count Aida Cloth, and Pack these kits Full of supplies. You will get a 16 page detailed instruction book, and Everything you need to complete two patches.  These "Design It Yourself"  kits are  brand new, and have never been seen before. You will need your own headband, as an exception. Several other finishing parts have been included. I even show you how to easily stitch on the acrylic Cabochons!   It's not JUST Cross-Stitch! You can do anything you want- blank charts are provided, so you can design your own. These photos show my own work,in sequence as I created them. I also have a Butterfly Kit, and a Hearts Kit, which is soon to be released.